

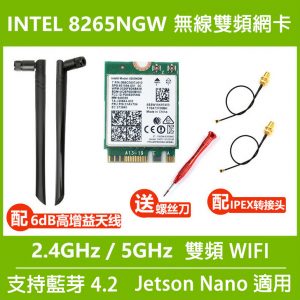


NVidia Jetson Nano intel 8265NGW 雙頻無線 WiFi 網卡 藍牙 4.2 AC8265 雙天線版本 + 轉接頭
原始價格:NT$850。NT$810目前價格:NT$810。 (未稅)
- 描述
- 評價 (0)
描述
描述
NVidia Jetson Nano intel 8265NGW 雙頻無線 WiFi 網卡 藍牙 4.2 AC8265 雙天線版本 + 轉接頭
NVIDIA Jetson Nano Developer Kit 原廠出貨預設是不包含 wifi 模組。幸運的是有一個連接器可以輕鬆添加一個!連接器是 M.2 Key E ,位於J etson Nano 開發板下方。(注意: M.2 Key E插槽主要用於無線通信。此連接器不適用於插槽M的NVME SSD)。
WiFi卡
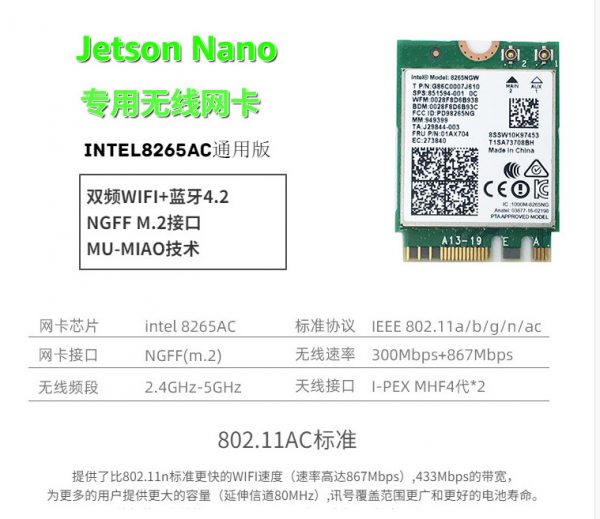
已經針對Jetson Nano驗證的Wifi卡之一是英特爾雙頻無線 -Ac 8265 W / Bt(英特爾8265NGW),它支持現在預期的802.11ac Wifi雙頻段,提供高達867 Mbps的其他許多不錯的產品。


Background
The NVIDIA Jetson Nano Developer Kit does not include a wifi module. Fortunately there is a connector to easily add one! The connector is M.2 Key E, located underneath the Jetson Nano Module. (Note: The M.2 Key E slot is designed for mostly wireless communications. This connector does not work with NVME SSDs which are Slot M).
WiFi Card
One of the Wifi cards which has been validated against the Jetson Nano is the Intel Dual Band Wireless-Ac 8265 W/Bt (Intel 8265NGW) which supports the now expected 802.11ac Wifi Dual Band delivering up to 867 Mbps with a host of other nice features. Also, Bluetooth 4.2, natch.
Installation
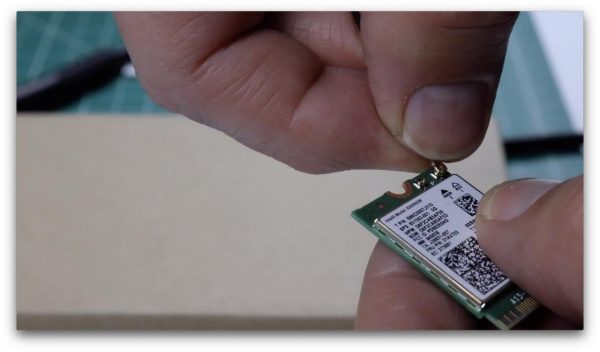
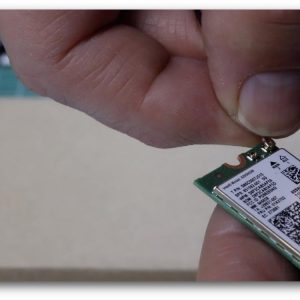
First attach the antennas to the WiFi card. In the video, it looks easy. Don’t believe videos. It usually takes a little bit of persuasion to “convince” the two together. The connectors are tiny.

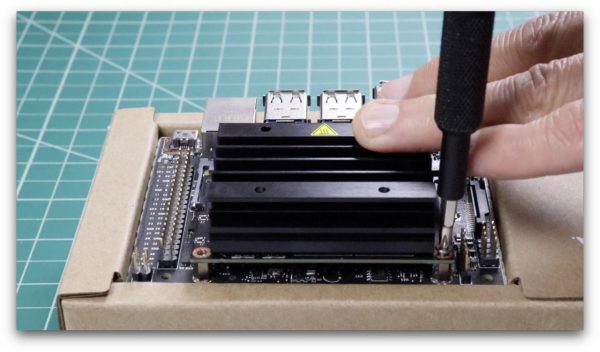
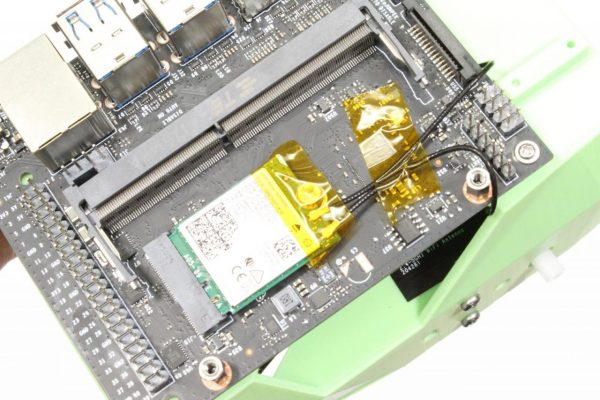
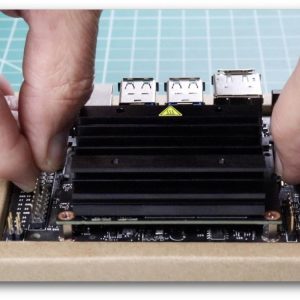
Next remove the Jetson Module from the carrier board by removing the two Phillips #1 screws at the front of the module. Then release the side latches located on either side of the module. These hold the Nano SODIMM module in place. The module will pop-up. Remove the module.
-

Remove module screws -

Release latches which hold the module in place.
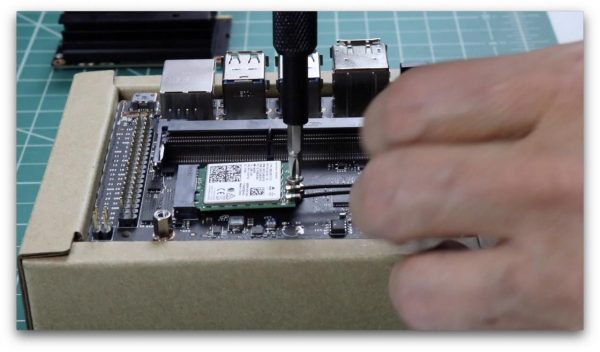
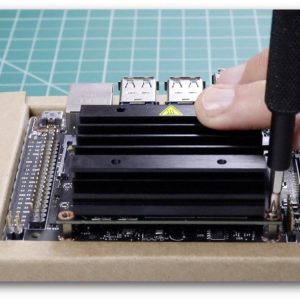
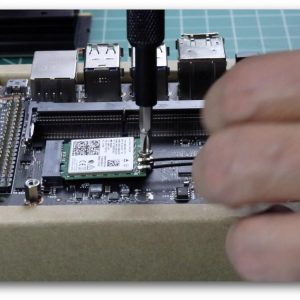
Remove the #2 Phillips screw located in the center of the board. Insert the Wifi card into the M.2 connector at a slight angle, and seat the card. Then install the #2 retaining screw. Route the wires from the antennas appropriately. You can use Kapton tape (1/8″ to 1/4″) to help secure them:
-
Remove module screws -

Secure WiFi card -

Kapton tape (polyimide) to route and protect wires. (Courtesy NVIDIA https://bit.ly/2uPRbie)
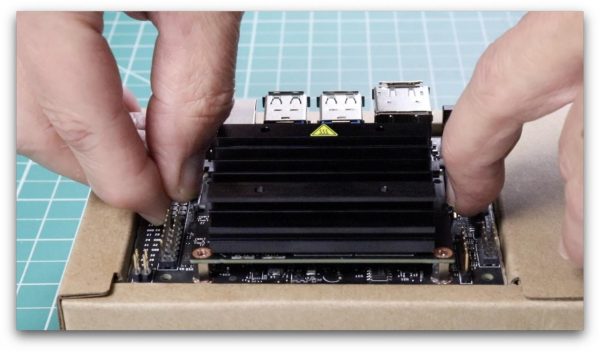
Replace the Jetson Nano SODIMM module. Angle the card up slightly in relationship to the connector, and insert the card. Make sure that it seats correctly. Then press down on the card until retained by the latches. Then replace the #1 screws to secure the board. Installation complete!
You are now ready to use the Jetson. Plug everything in, and follow the usual wireless network selection process. See the video if you need more details.
In the video, we played around with a Sony Playstation PS4 controller. If you’re a maker, that’s a straightforward way to get easy input from buttons and variable input from the joysticks and triggers.
評價 (0)
搶先評價 “NVidia Jetson Nano intel 8265NGW 雙頻無線 WiFi 網卡 藍牙 4.2 AC8265 雙天線版本 + 轉接頭”
你必須登入才能發表評論。
相關商品
-
ESPRESSIF (ESP) 開發板
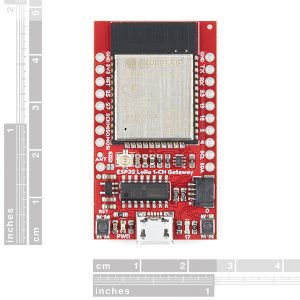
ESP32 LoRa 1-Channel Gateway LoRa 單通道 LoRaWAN 網關模組 SparkFun 原裝進口
原始價格:NT$1,480。NT$1,295目前價格:NT$1,295。 (未稅)產品速覽 -
-
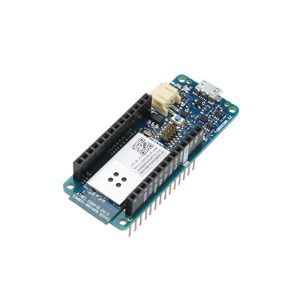
Arduino 開發板
Arduinoz MKR1000 物聯網開發板 WIFI 物聯網設備開發 Arduino.cc 原裝進口
原始價格:NT$1,530。NT$1,250目前價格:NT$1,250。 (未稅) -
ESPRESSIF (ESP) 開發板
WeMos D1 R32 ESP-32 開發版 藍芽+ WIFI + UNO R3 一體 4MB 記憶體
原始價格:NT$310。NT$230目前價格:NT$230。 (未稅)產品速覽


商品評價
目前沒有評價。